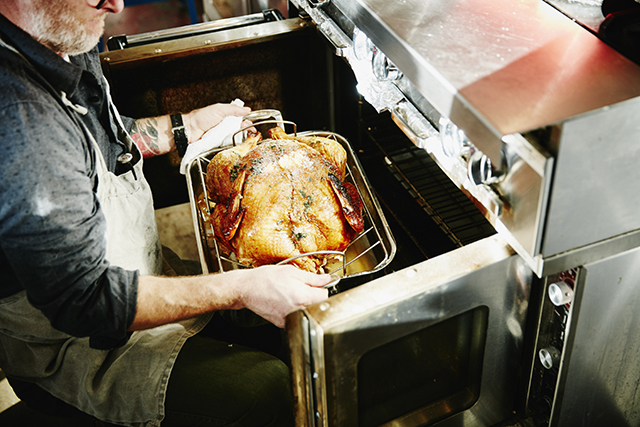
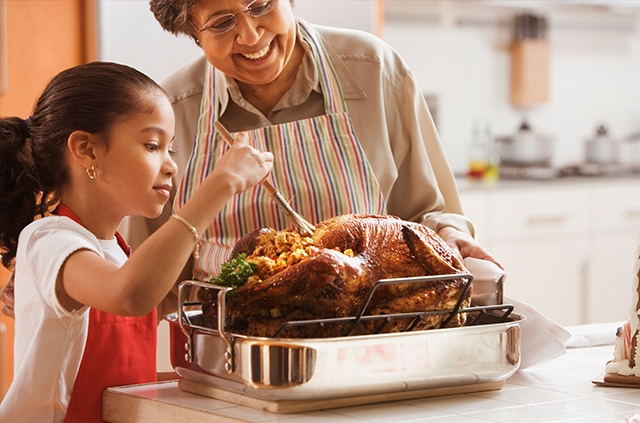
The turkey is practically synonymous with Thanksgiving and holiday dinners, a call-back to the wild fowl that still roams the Northeast where pilgrims once landed. In honor of the upcoming holiday, check out these turkey cooking tips for choosing, preparing and roasting the perfect bird.
Holiday Turkey Cooking Tip No. 1: Choosing Your Turkey
When selecting the perfect bird for the center of your holiday table, there’s a surprising variety of turkeys to choose from. If it’s just you and your significant other or a small group of family members this year, consider going for a slightly smaller turkey, choosing a turkey breast or trying something new. From heritage and kosher to organic and free-range birds, there’s more to turkey than simply fresh or frozen.
Prefer an audio summary of this post? Click below to listen to this article.
Heritage
Heritage breed birds are descendants of America’s first turkeys. These turkeys are typically free-range (allowed to roam outside), not as fatty and boast big, slightly gamy flavors thanks of their diverse diets. Heritage birds tend to have smaller breasts, darker meat and cost more than conventional turkeys.
Kosher
Kosher turkeys are processed following kosher standards (no mixing of meat and dairy, avoiding shellfish, etc.) These turkeys can be found fresh or frozen and sometimes organic. Kosher turkeys usually come pre-brined, meaning they’ll hold onto moisture, but you should avoid over-seasoning.
Fresh
Fresh turkeys are never chilled below 26 degrees. They should be kept in the coldest part of your refrigerator and cooked a day or two after purchasing. They are available in organic and/or free-range varieties. These turkeys are milder in flavor compared to heritage and brined kosher birds but are more moist and will cook faster than frozen turkeys.
Frozen
Frozen turkeys need to be thawed in the fridge – about 24 hours for every 5 pounds, according to the U.S. Department of Agriculture. In a pinch, you can submerge your sealed turkey in cold water to help it defrost faster. Frozen turkeys are some of the most widely available and affordable. The ability to buy them so far in advance allows for peace of mind and plenty of time for planning how to prepare it.
Pro Tip: When it comes to deciding on size, there should be about 1 to 1-1/2 pounds of turkey per person you plan to feed.
Holiday Turkey Cooking Tip No. 2: Prep and Seasoning
One of the biggest faux pas you can make when preparing a holiday feast is overcooking the turkey. Avoid making dry, bland turkey with these tips.
Brining
Wet brine your turkey in a seasoned, saltwater solution and refrigerate for 24 hours. Or, dry brine your bird by rubbing the outside with salt and allowing it to rest in the fridge for 24 hours or more. Both will help keep your turkey moist.
Seasoning
When seasoning, you can’t go wrong with classic salt and pepper. Tucking fresh herbs like rosemary, sage or thyme under the skin or inside your bird is another great way to impart flavor. Aromatics like carrots, celery, onion and garlic can also go inside or in a pan under your turkey. For crisp skin, rub the turkey with butter or olive oil.
Glazing
While traditionally seasoned turkeys are great, if you’re looking to try new flavor profiles this year, consider making a glaze, like cranberry-orange, black pepper-pomegranate molasses or mustard-maple. Seasoning your bird with a balance of salty, sweet, spicy and acidic flavors can elevate your entire meal.
Stuffing
For optimal food safety and to allow the turkey to cook as evenly as possible, the USDA recommends cooking stuffing on the side rather than inside your bird. However, if cooking stuffing in the turkey is a must, pack it loosely to allow for proper cooking and use a thermometer to make sure it reaches a safe internal temperature of 165 degrees.
Basting
While it may stray from family tradition, basting isn’t necessary to get a moist or flavorful turkey. Basting requires you to repeatedly open the oven, which is something you generally want to avoid. Opening the oven again and again causes heat to escape, prolonging the cooking process and resulting in a dry bird. Flipping your turkey or tenting it with aluminum foil halfway through the cooking process are other methods you can try to trap moisture and get a juicy result.
And don’t forget to use the drippings to make homemade gravy.

Holiday Turkey Cooking Tip No. 3: Cook Time and Resting
Regardless of the type of turkey you choose, the ideal temperature to bring your bird before cooking is 40 to 45 degrees. When roasting your turkey in the oven, plan for about 15 minutes of cook time per pound, plus additional rest time. Again, remember your bird will cook more evenly it’s not densely stuffed. And, try to resist the urge to open your oven unnecessarily.
About 30 minutes before you expect the turkey to finish cooking, use a reliable meat thermometer to check the turkey’s temperature. Insert the thermometer in the meatiest parts of the turkey, making sure to avoid hitting bone.
“The turkey should reach 180 degrees in the thigh, 170 degrees in the breast and 165 degrees in the center of the stuffing,” according to Samantha Woulfe, a Butterball Turkey Talk-Line expert.
If you plan on deep-frying your turkey, make sure you have the necessary equipment: a large turkey frying pot, outdoor propane burner, sturdy stand, ground covering and a fire extinguisher (just in case). Make sure your turkey is completely thawed before frying your bird in 350-degree oil for about 3 1/2 minutes per pound.
After cooking, lock in your turkey’s juices by loosely tenting it with foil and allowing it to rest for at least 30 minutes before you start carving. It’s important to make sure you don’t cover the bird too tightly to avoid steaming and losing any crispy skin.
Carve your turkey using a large cutting board on a stable surface and a chef’s or carving knife. A carving fork can help keep the bird stable while you cut if you don’t want to use your hand. Follow this step-by-step guide for details.
To assure food safety, “leftovers should be stored in containers in the refrigerator within two hours of cooking … [and] eaten or put in the freezer within three days,” said Woulfe.
If you have specific questions or concerns, you can call or text Butterball’s Turkey Talk-Line for assistance. Butterball answers more than 100,000 questions every November and December, helping home cooks properly cook their holiday birds. Experts will be available to all cooks, whether you’re preparing a Butterball turkey or not.
Don’t Forget The Sides
While turkey may be the centerpiece of your holiday meal, the sides are just as important – if not more. When choosing what to make, think about what would complement the meal as a whole, incorporating lots of different flavors and textures to keep a varied tablescape. Our favorites include marshmallow-topped sweet potatoes, buttery whipped mashed potatoes, stuffing and this cornbread casserole:
Beverages and Mocktails
When hosting for the holidays, it’s essential to have a variety of drinks your guests can help themselves to. Sparkling cider, soda, eggnog – you name it. Make sure to take stock of what your guests enjoy so you can have their favorite waiting for them.
Mocktails add even more variety to your drink options and are fun for kids, designated drivers and anyone who prefers not to drink alcohol. Try making a mocktail that’s themed to the occasion so it’s even more special.
For Thanksgiving, we suggest this blood orange-flavored creation:
- 1 blood orange, for slicing
- 1/2 cup blood orange juice
- 1/3 cup sugar
- 3-4 sprigs of fresh thyme
- 1 can ginger beer
- 1/2 cup cranberry juice
- 6 fresh cranberries, for garnish
Watch how it comes together by pressing play below!
For the winter holidays, try a Jack Frost themed mocktail:
For more Thanksgiving recipes, check out our Thanksgiving Sides Showdown.
What’s your favorite thing about Thanksgiving? Tell us in the comments.
14 Thoughts on “Talking Turkey: Holiday Turkey Cooking Tips”
Leave A Comment
Comments are subject to moderation and may or may not be published at the editor’s discretion. Only comments that are relevant to the article and add value to the Your AAA community will be considered. Comments may be edited for clarity and length.


My method has been by far the best of anyone I know for decades. I rinse the turkey thoroughly, stuff her, rub her thoroughly with olive oil and season lightly with a mixture of paprika, curry, turmeric, basil and oregano. I place her on the rack and cover her with aluminum foil, puncturing a handful of fork holes in it. The key is – this is the best part – I place her in the oven at 10 PM the night before at 195 degrees, and let her slow roast overnight. By noon on Thanksgiving day she is not only thoroughly cooked but so moist and tender that she falls off the bone; hence I need to use one of those racks that splits apart by pulling a pin, otherwise it’s impossible to transfer her to a platter. Try this – I’m telling you it’s the best you will ever experience!
Your method sounds interesting – is the skin still very crispy?
Absolutely and the meat is so tender as I said it falls off the bone.
I am curious, how big a turkey a turkey are you cooking? For 1:00 PM dinner that would mean the turkey would be cooking for 14 hours. I am also wondering if the skin is crispy.
About 24 pounds and yes, the skin is very crispy. Slow cooking is always a great way to cook; nothing is dried out. We shouldn’t rush!
I would be a little nervous about so low an oven temperature. It seems to me that much of the meat would be in the danger zone for a bit too long. I use 300F and usually only cook a small (organic) bird, maybe 10-12 lbs. Nevertheless, a friend of mine cooked it your way and it was delicious (and I’m still alive)
That’s the way my grandmother & mother always made it when I was growing up.
We cook our turkey upside down for half time, then flip it breast up. The “fat” and juice from the dark side “baste’s the breast side. Best moist turkey and crisp skin.
What is the oven temperature for roasting at fifteen minutes per pound?
Hi, Ruth. Great question! I’ve seen most recipes say between 325 and 350 degrees, depending on the size of your bird.
Butterball recommends cooking a 12- to 16-pound turkey at 325 degrees for at least 3 hours in this recipe.
I hope this helps! Thanks for reading and commenting!
Good Article!
Thank you your turkey tips. I brine my turkey
Dry rub. Have in past did a salt, seasoning
wet, but I can’t store in refrigerator.
Thank you for these turkey tils
The hip joint is allways the last part of the bird to finish cooking. If you dislocate the hip joint and push the thigh bones into the cavity, the thighs will be up to temperature around the same time as the breast meat. Tie the legs together to keep the juices in the bird.